Achieving beautifully shaped and healthy nails can be a game-changer for your overall appearance.
Learning how to file nails the right way makes a big difference! I know how great it feels to have pretty nails. It’s a small thing, but it can boost your confidence big time.

What You Need to File Nails

Are you ready to up your nail filing game?
But before diving into the step by step guide of how to file nails. Grab first your tools so we can get started.
1. A Soft Nail File: The Foundation of a Good Manicure
A foundation tool for shaping natural nails without causing damage. Look for a “grit” number – the higher, the softer. A 240-grit nail file is recommended.
2. Nail Clippers: The Cutting Edge
Essential for trimming hangnails or long nails. Never use toenail clippers on fingernails or cut cuticles.
3. A Nail Buffer: Smooth Operator
While a nail buffer is optional, it is a beneficial tool that smooths out rugged edges and prepares nails for painting.
4. A Wooden Stick: The Handy Helper
Also called “orange wood”. This is useful for pushing back cuticles, cleaning nail beds, removing dirt, and cleaning up excess polish.
5. A Dust Brush or Cotton Ball: Cleanliness is Key
You’ll definitely need this for cleaning up nail dust post-filing.
6. A Medium-Sized Bowl with Warm Water: Soak It Up
Optional for soaking nails, ensuring cleanliness before painting. Let your clients’ nails take a little dip. Ahh, relaxation at its finest.
7. Moisturizer: Nourish Those Nails
This step is especially crucial if they suffer from dry skin or brittle nails. So, slather on that moisturizer and give those nails the love they deserve.
Tips For Filing Nails
You should apply specific methods and tips to make sure your nails are well-treated while being filed. Here are a few useful tips on how to file nails.
Pick the Right File

Choose the best file for your nails! Clean it before and after use. Glass nail files stop nails from tearing.
Clean files keep nails from splitting. This helps fingers and toes. The right tools make nails look great after filing. Glass files are best. Other files can make nails rough and polish chips fast.
Embrace Your Natural Nail Shape

Love your unique nail shape! Nails can be long, short, or wide, and each has its own cool strength. Use this strength to pick a style when you file them.
This makes them look their best for polish and nail art.
Slow Down
Take your time when filing nails! At nail salons, pros spend a lot of time shaping nails. If you rush, it can make a mess.
Being careful means your nails won’t get hurt and will look even better after your manicure or pedicure.
How to File nails and Shape it
Now that you have the tools. Here is a quick guide on how to file nails and shape your nails properly:
Step 1. Use a Soft Nail File
As mentioned above, using a soft nail file is best for filing natural nails. Using a 240-grit nail file is a great place to start.
Before you pick up your file and begin filing away, pay attention to the way you hold the file. Do not grasp the file.
Holding the soft file loosely between the thumb and index finger will allow you to have a firm handle on it and also easily move it in the appropriate direction.
Step 2. File in One Direction

Here is a common mistake many DIY manicurists make. When filing nails, be sure to file them in one direction ONLY. Back-and-forth sawing motions are never okay.
Start from the center or the side of the nail and move in one direction—either from the side to the center or from the center to the side. Just be sure to choose one direction and stick with it.
Filing your nails back and forth will lead to breakage, tearing, and rugged edges. Not only is this method best for keeping nails healthy and smooth, but it will also help you to easily get the shape you want.
Step 3. Hold the File Flat

It might seem like second nature to hold a nail file at an angle, and some beauty blogs will tell you to do so. However, it’s best to hold the nail tip flat against the file while filing.
Holding the nail file at an angle while filing will thin the nail tip making it more susceptible to damage and breakage.
Although filing nails flat and in one direction might take longer than filing back and forth, you will likely be pleased with how your nails look afterward.
Note: If you accidentally file nails too short, don’t fret. Remember, like hair, nails will grow back.
If you file nails too short, consider applying a neutral nail polish color, which can make nails look naturally longer until they grow to the desired length.
Step 4. Shape the Nails
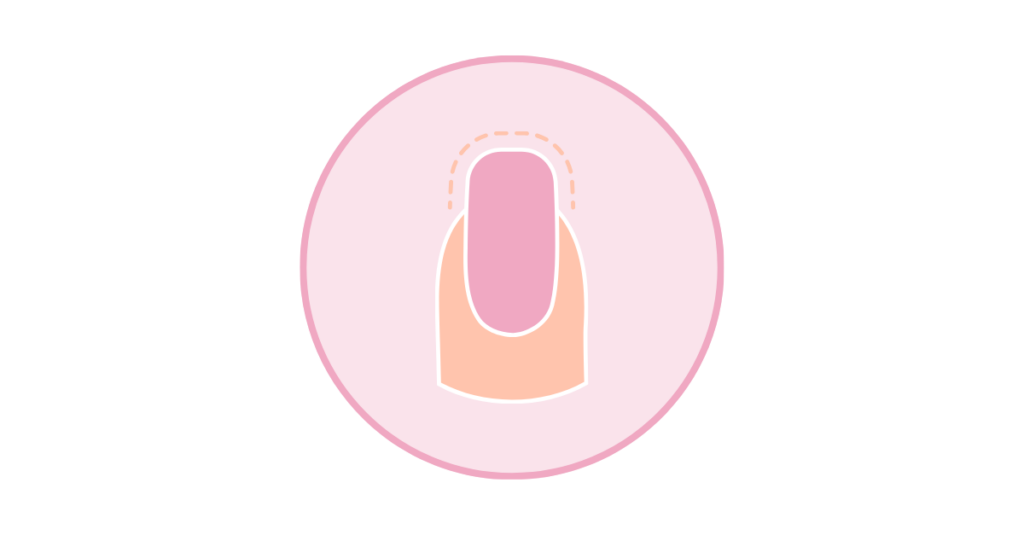
Filing nails to smooth rough edges is one step, but getting the desired nail shape is another.
You can easily file your nails to get the nail shapes that you want. Here are some nail shapes you can achieve by filing:
- Round shaped nails
- Square shaped nails
- Almond shaped nails
- Oval nails
- Coffin nails
- Stiletto nails
Each desired shape has its own levels of filing difficulty and skill.
Round nails are by far the easiest and most common shape to achieve. Use a file and simply round the edges and the top of the nail tip until you achieve a round shape. The same process goes for achieving square and oval nail shapes.
On the other hand, almond nails and stiletto nails require more time and patience. These shapes involve squaring the sides and edges, and then carefully rounding them at the top, bringing them to a point.
You can achieve any desired nail shape: the key is filing.
Note: Be careful not to file the nails too much. Filing too far in on the sides can weaken the nail causing nails to break easily.
Step 5. Dust Off Nails
Once you achieve the desired shape and you are finished filing, the next step is to brush off the nails using a nail dust brush or cotton ball.
Be sure to also dust off your work area before you begin painting. This will help to ensure that nails are clean from excess nail dust and dead skin before painting.
Step 6. Soak Nails

Before painting nails, soak nails in soapy water for a few minutes to properly sanitize and remove any excess dirt, dead skin or nail dust prior to painting.
Not only will this step ensure a smooth paint job, it will also help sanitize the nails to prevent infections.
However, if your nails are dry, brittle, and are prone to breakage or damage, then you may want to skip this step as soaking can dehydrate nails, making them even more brittle and susceptible to damage and breakage.
Step 7. Apply Base Coat and Paint

Now that you know how to file nails and shape them, the final step is to apply a base coat to help protect nails, avoid infections, and keep nails looking healthy and clean.
After applying a base coat, you can also paint the nails with a nail polish color of your choice.
Step 8. Moisturize
Once you have finished painting your nails and are happy with the outcome, the last step is to moisturize.
Using your favorite moisturizer (preferably one with Aloe or Vitamin E), apply a dime-sized amount of moisturizer on your hands and smooth into the skin and cuticles sufficiently.
Be sure to make sure your nails are dried completely before moisturizing to avoid smudging or ruining your artwork.
What Not to Do: Common Nail Care Mistakes to Avoid

Here are a few things to keep in mind:
1. Filing Wet Nails: It’s best to file your nails when they’re dry to prevent damage and breakage.
Wet nails are more prone to tearing and peeling, so be patient and wait for them to dry before grabbing that file.
2. Over-Filing: Remember, less is more when it comes to filing your nails.
Over-filing can weaken the nails and lead to breakage. Take your time and file gently, allowing the file to do the work.
3. Neglecting Cuticle Care: Your cuticles play an important role in the health of your nails.
Don’t forget to moisturize and gently push back your cuticles regularly to keep them looking neat and healthy.
4. Using the Wrong Tools: Using the wrong tools can do more harm than good.
Invest in high-quality tools that are specifically designed for nail care to ensure the best results.
By avoiding these common mistakes, you’ll be well on your way to achieving gorgeous, healthy nails.
Final Thoughts

Did you find this tutorial on how to file nails helpful?
Achieving the perfect nails is not only a confidence boost for me but should be for you as well.
These tips and tools are crucial in ensuring your nails are healthy and beautiful. I’d love to know what you think!
Please share your thoughts in the comments below on how to file nails. If you enjoyed the article, don’t hesitate to share it with your friends!
